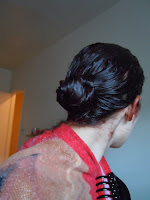
Alrighty, I promised I'd do a post after I dye my hair.
*Please note that the color I chose was meant to be close to my natural hair color, only a bit more reddish.*
So, let me just take you through the process!
I wanted to re-dye my hair because, as you can see in the picture, it started to grow out and you can sorta see a difference, although small.
I chose this dye because I heard L'Oréal Paris ones are pretty good. It was 11,99$.
This color is called Light Red Brown, which is very similar to the color I dyed my hair previously.
These are the 3 products that come inside the box, other than the plastic gloves and the instructions.
So, first you have the developer cream, in which you squeeze in the No Ammonia Cream Color. Finally, you have the Healthy Shine Conditioner.
First step is to put the cream color in the cream developer. Shake it very well and then distribute it onto the hair evenly. Start with the roots and then do the rest of the hair. I recommend sectioning your hair to be sure to get it everywhere. When it's done, put it up in a bun and let it sit for 10 mins. Check the instructions as time may vary.
Then, you rinse it out until the water dripping from you hair is clear. Finally, you apply the Healthy Shine Conditioner and you keep it in your hair for at least 2 minutes. Rinse everything out and dry your hair!
I know, I look horrible in this picture, but I still wanted to show you the result! It came out pretty well. My hair looks normal brown but more reddish in natural lighting or in sunlight. The only thing I didn't like about this dye is that it stained a lot. The dye I used before didn't stain at all, and I kept it longer. I have stains on my arms, neck and forehead. Although, I really liked the "No Ammonia" part, and the glossy finish.
Overall, I'd probably rate this 4/5 stars, just because of the stains.


No comments:
Post a Comment